Starting your first project
Creating the project
To create Micronaut projects, the fastest way is to use Micronaut Launch.
Open the above link in a new tab, and select these options:
- Application type: Micronaut Application
- Java version: 17
- Name:
book-microservice - Base package:
uk.ac.york.cs.eng2.books - Micronaut version: the latest non-SNAPSHOT 4.x version (4.7.4 as of writing)
- Language: Java
- Build tool: Gradle
- Test framework: JUnit
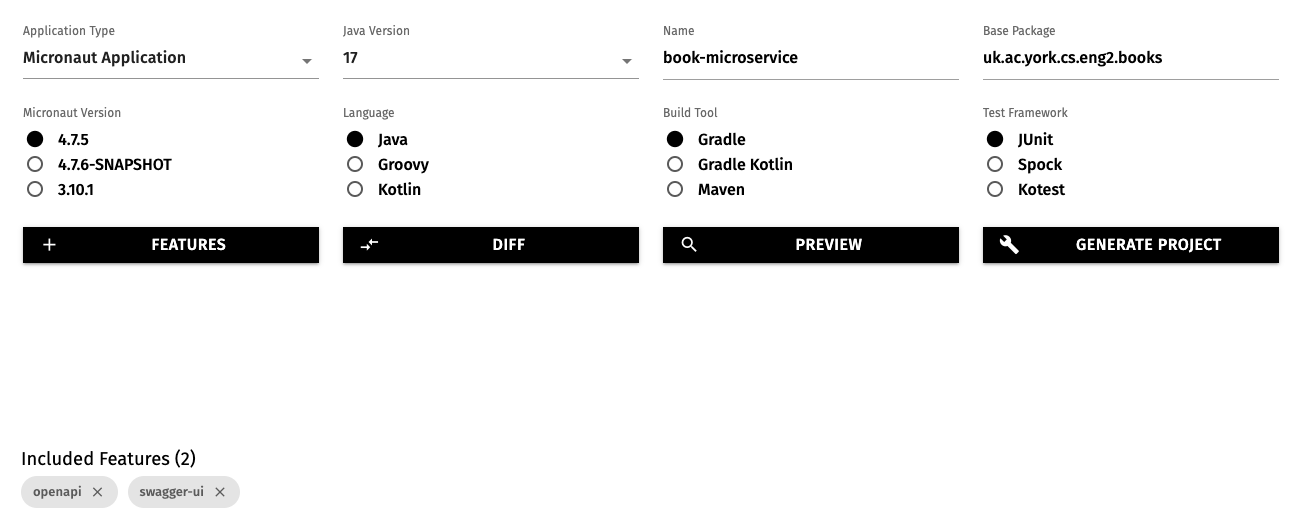
Click on the “Features” button, and add the openapi and swagger-ui features.
This will make Micronaut automatically produce a web-based user interface to try out our microservice.
The options will look like this:
Click on “Generate Project - Download Zip”, and unzip the produced ZIP file into a folder named book-microservice.
Importing the Micronaut project into IntelliJ
Open IntelliJ IDEA. If you have any projects open, close them with “File - Close Project”.
Select the “Projects” section on the left, and click on the “Open” button on the top right.
Select the book-microservice folder (the one containing the settings.gradle file produced by Micronaut Launch).
You may get a dialog from IntelliJ asking if you can trust the project: select “Trust Project”.
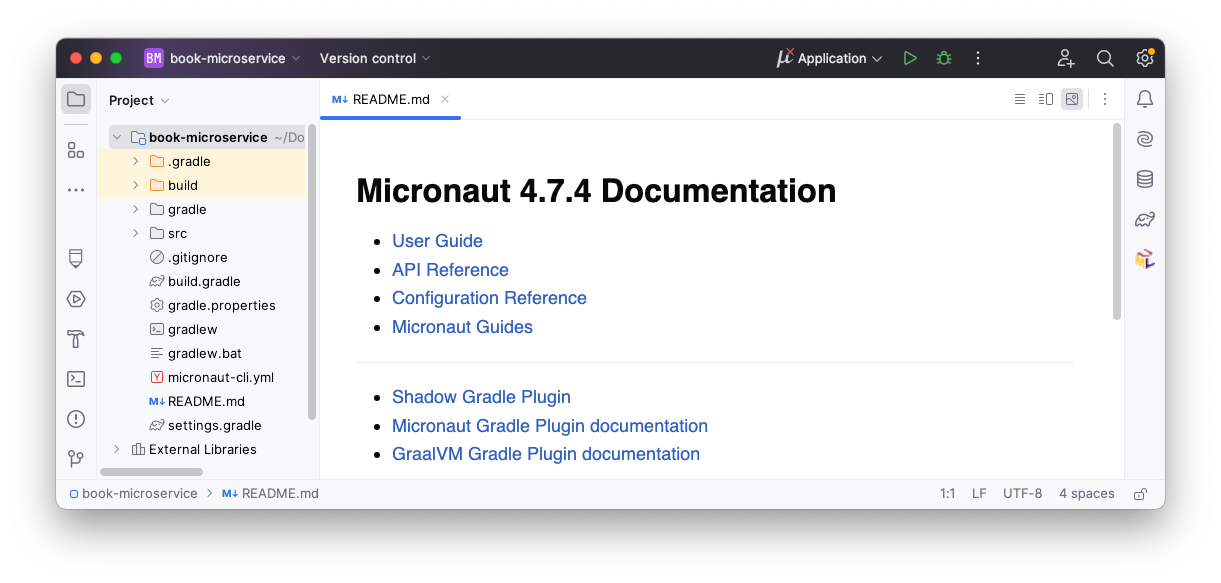
IntelliJ should now display your project, like this:
Setting the Java version in IntelliJ
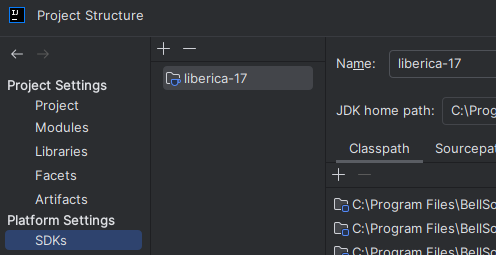
If your default Java installation is not Java 17, you will have to manually tell IntelliJ to use your Java 17 Development Kit.
First, go to “File - Project Structure…”, and in SDK ensure that you have picked a Java 17 installation, like this:
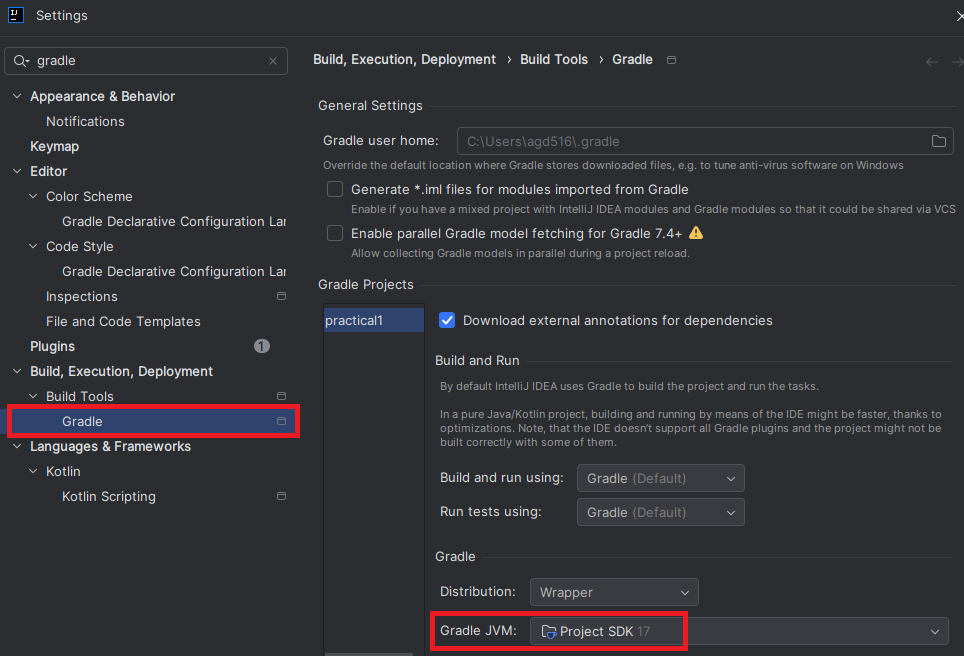
Click on OK, and then go to “File - Settings…” and search for Gradle on the left. Select the “Gradle” item inside the category for build tools, and ensure it uses the “Project SDK”, like this: